

These pop-able little sticks were first made for a Super Bowl party. Think about it...amongst a table spread with delicious savory food items, wouldn't it be nice to have a little sweet treat at the end? You know, a portable finger food that you just put out in a bowl let people grab? Sure, you could do cookies, brownies or other crumb-dropping delicacies. But I went for the unusual and got creative with my pantry supplies: pretzels, mini marshmallows and Hershey's bars. Let me tell you, these babies were a huge hit. Mine was the only empty bowl amongst a sea of half-eaten chips, dips, pizzas and cheeses. Guys were literally battling it out rock-paper-scissors style for the last one.


I'm not going to lie to you....this little treat is a bit time consuming, and there is a bit of technique. First you have to skewer your marshmallows on the pretzel sticks, but gently so they don't break. (But if they do, you just eat them....so it's a win-win!) Then you have to spread the melted chocolate around them evenly, before finally setting them to harden and cool on a plate. But even with the time they require, they're quite easy and fun to make. I typically make these on our coffee table while watching a movie (last time it was a documentary on Elmo....super interesting!) It makes for quite a relaxing afternoon, complete with the pleasure of my husbands impending treat-ecstasy.

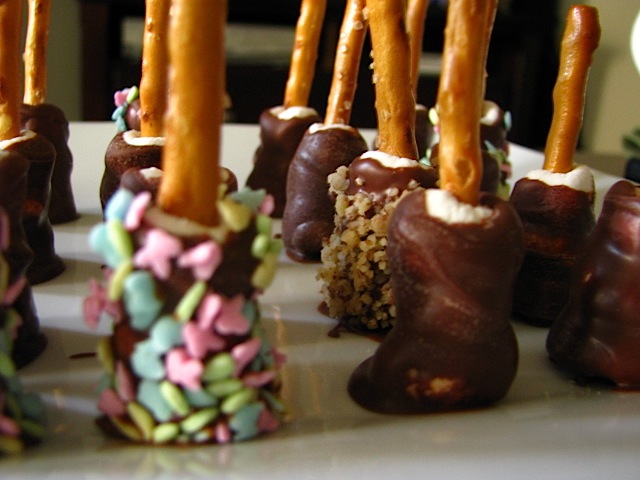
This time, I got a bit festive with my skewers...mostly due to the over-abundant supply of sprinkles in our household (we're outnumbered by the thousands). My hubby's favorite variation is walnut rolled, so I threw a few of those in as well. I would imagine that these would keep in an air-tight container for about a week, but they've never made it longer than two days in our house so don't hold me to that quote. After all, it's a salty little pretzel with chewy marshmallows dipped in milk chocolate. How can you say no to just one more?
S'more Skewers
- 1 bag pretzel sticks
- 1 bag mini marshmallows
- 5-6 bars chocolate or chocolate chips (milk or dark...your choice!)
- sprinkles and chopped nuts (optional)
Begin by skewering a bunch of marshmallows with the pretzel sticks. Hold a pretzel stick in one hand and pick up a marshmallow. Gently push the pretzel into the flat end of the marshmallow until the stick is all the way through. Grasp the marshmallow with your first two fingers and thumb so it has even pressure on all sides, then slide it up the pretzel until you're about a third of the way across the stick. Repeat twice more so you end up with three marshmallows on the stick and the last marshmallow flush with the end of the pretzel. If the marshmallows are a bit mashed, just slide them together and fluff up with your fingers. Set aside in a bowl and pick up another pretzel.
When you have a bowl full of skewered marshmallows, line a cookie sheet with parchment paper. Melt 1 bar of chocolate (or 1/2 cup chips) in a small microwave-safe dish such as a ramekin or shallow mug. Using a knife, spread the melted chocolate around the sides and bottom of the marshmallows. Roll gently in nuts or sprinkles if desired. Set on the parchment paper to cool, holding for 10-15 seconds to help them stand up if necessary. Repeat, melting more chocolate as necessary, until the ingredients run out.
Let the chocolate cool until completely hardened. Store in a cool location in an air-tight container. And if you find out how long they stay good for, please let me know....we can't go more than a couple days! Excellent to have around as sweet little snacks or served as a finger food at parties.
No comments:
Post a Comment